

WHAT’S IN THE BOX
Check the kit before you start.
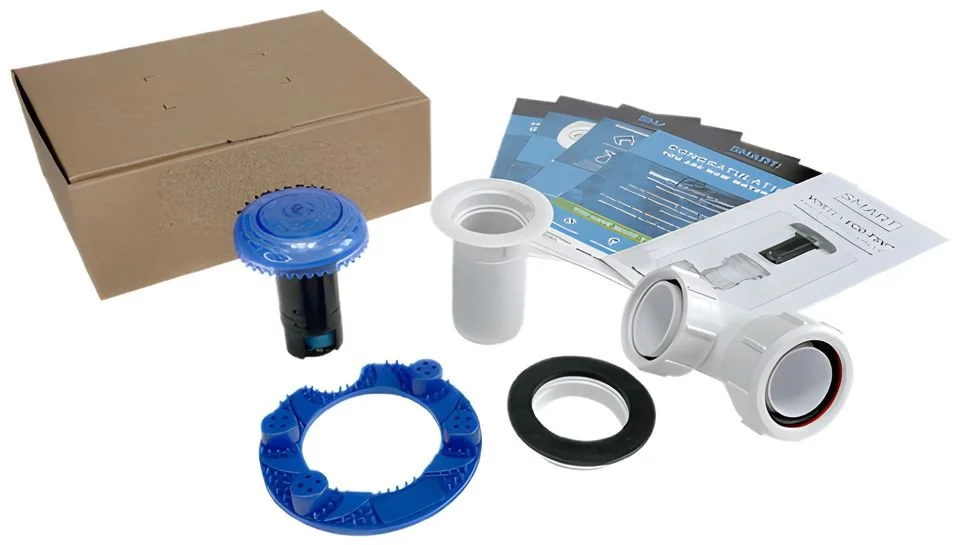
One kit converts one urinal with a 32 or 40 mm outlet.
- Vortex ECO-TSV™ valve and fitting key
- Smart Guard fragranced mat
- Urinal adaptor, 32 or 40 mm
- Counter nut and washer
- Multi-fit compression bend
- Fitting and cleaning instructions
- Washroom posters for the client and cleaning team
You’ll also need: a bucket, a cleaning cloth, disposable protective gloves, silicone sealant and Steri-Kleen cleaning spray, plus 40 mm pipe and fittings if the waste needs extending.
FITTING STEPS
Eight steps, in this order.
These are the steps from the leaflet in your kit. Read them all through before you start.
 01
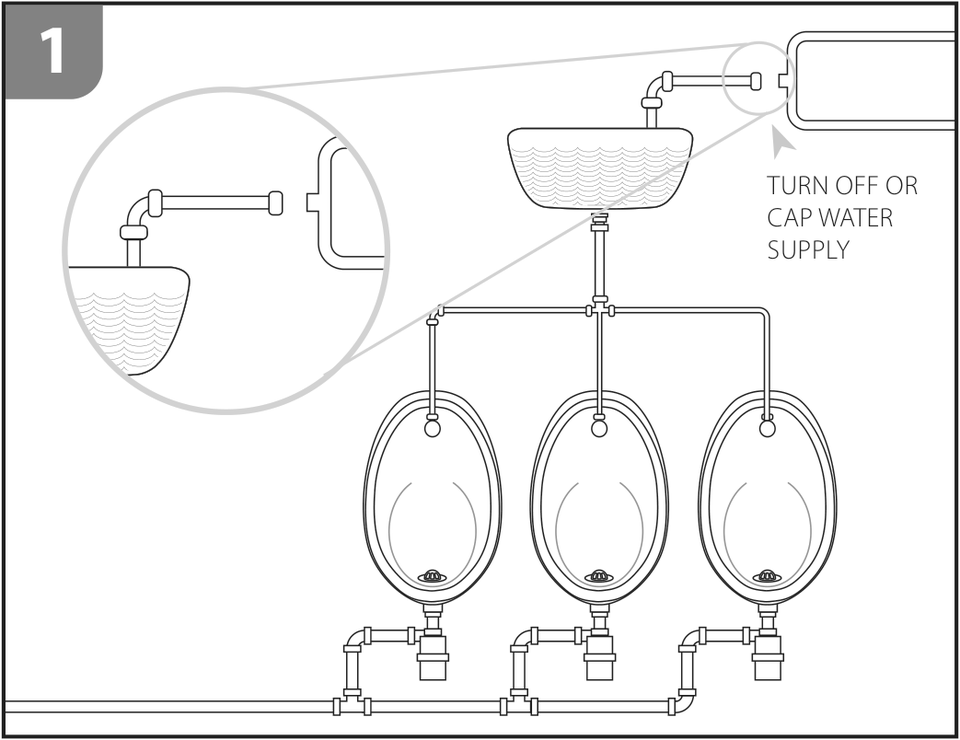
Isolate the water supply
Before you start work, turn off or cap the water supply and feed to the urinal, and drain the cistern fully in accordance with all regulations.
Cap redundant supply pipework as close to the live supply as you can. A dead leg left full of standing water is a Legionella risk.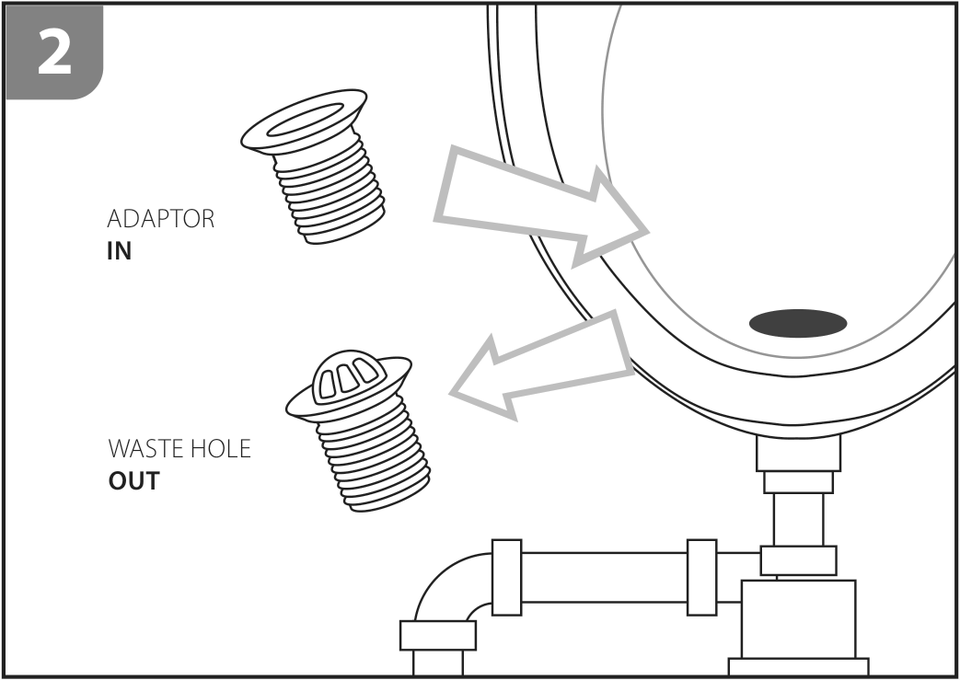 02
Fit the adaptor
Take out the existing waste outlet and replace it with the adaptor supplied in the conversion kit, as pictured. Seal it with silicone.
 03
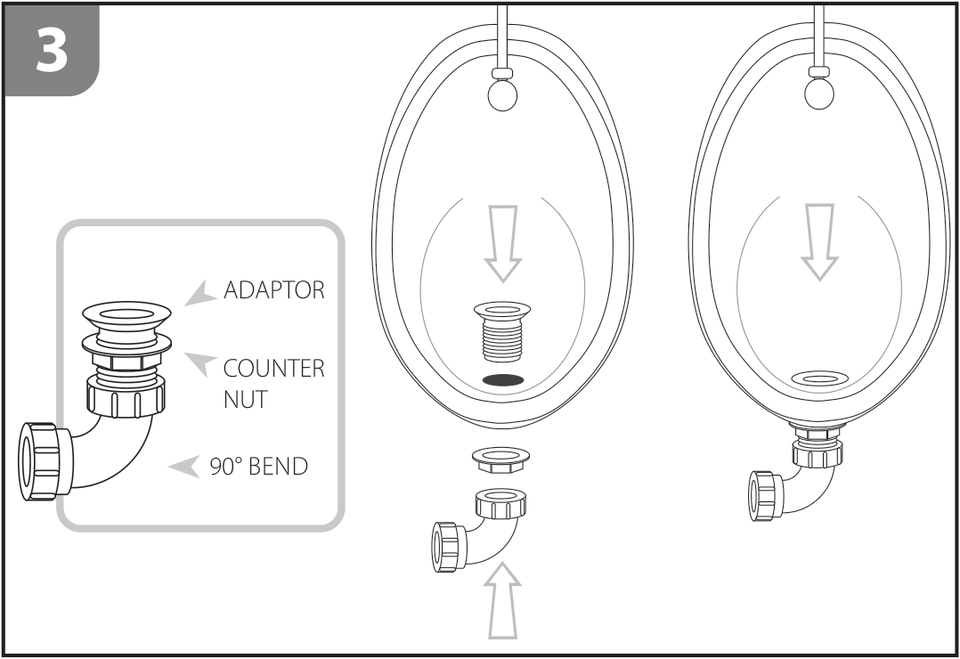
Fit the counter nut and bend
Take out all existing water traps and bends. Fit the counter nut supplied to secure the new adaptor, then use the 90° bend to connect to the existing waste pipe, with a solvent or compression joint, or a combination of both.
 04
Check the waste and the fall
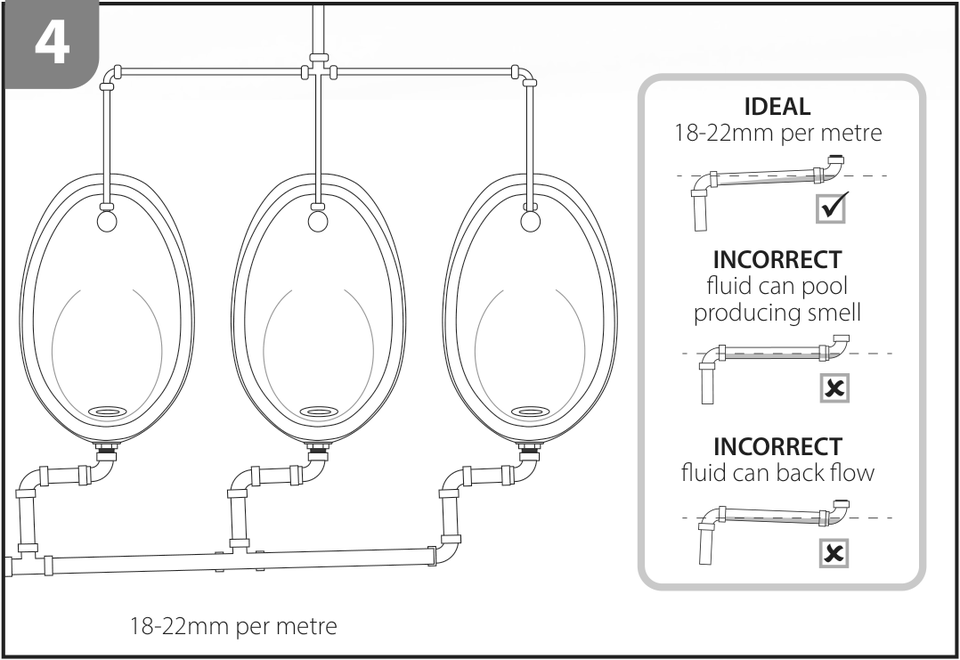
Make sure all pipework is clear and clean back to the main drain, with no blockages. It must be piped to the standard regulations, tested for leaks and flushed with water, with a fall of 18 to 22 mm per metre towards the main drain pipe.
 05
Fit the valve
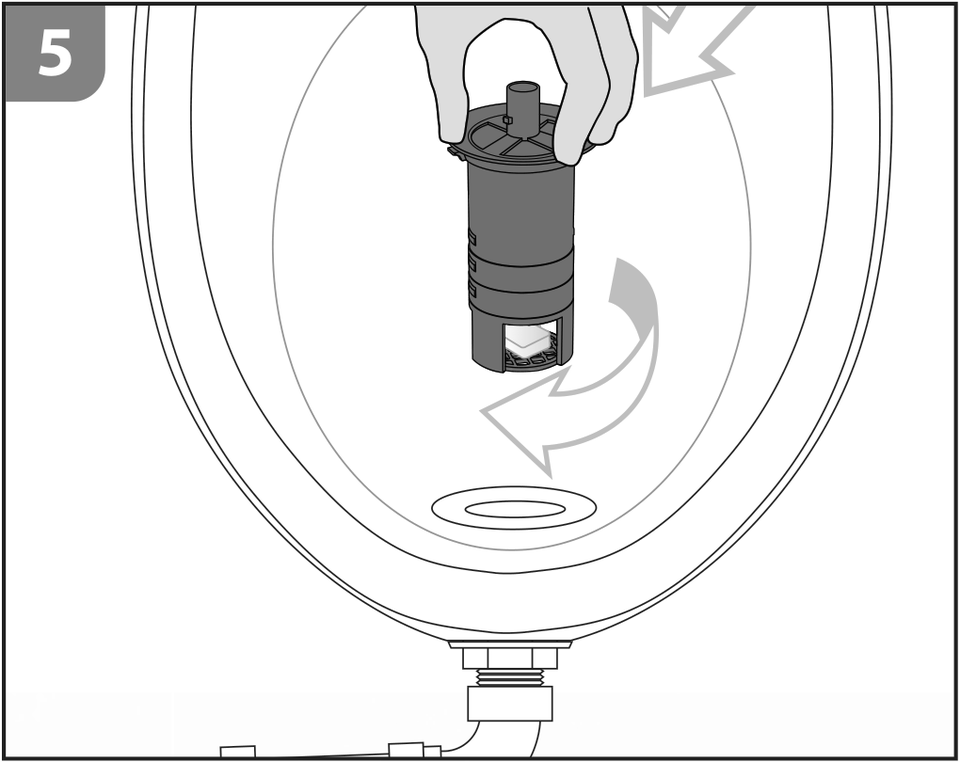
Lift the top straight off the valve. Insert the new Vortex ECO-TSV™ valve, which comes with a pre-loaded Steri-Kleen pipepod, into the adaptor, then use the fitting key to plug, twist and lock it into position.
Check it’s locked: the valve must not lift out. The lock forms the seal between the waste pipe and the washroom.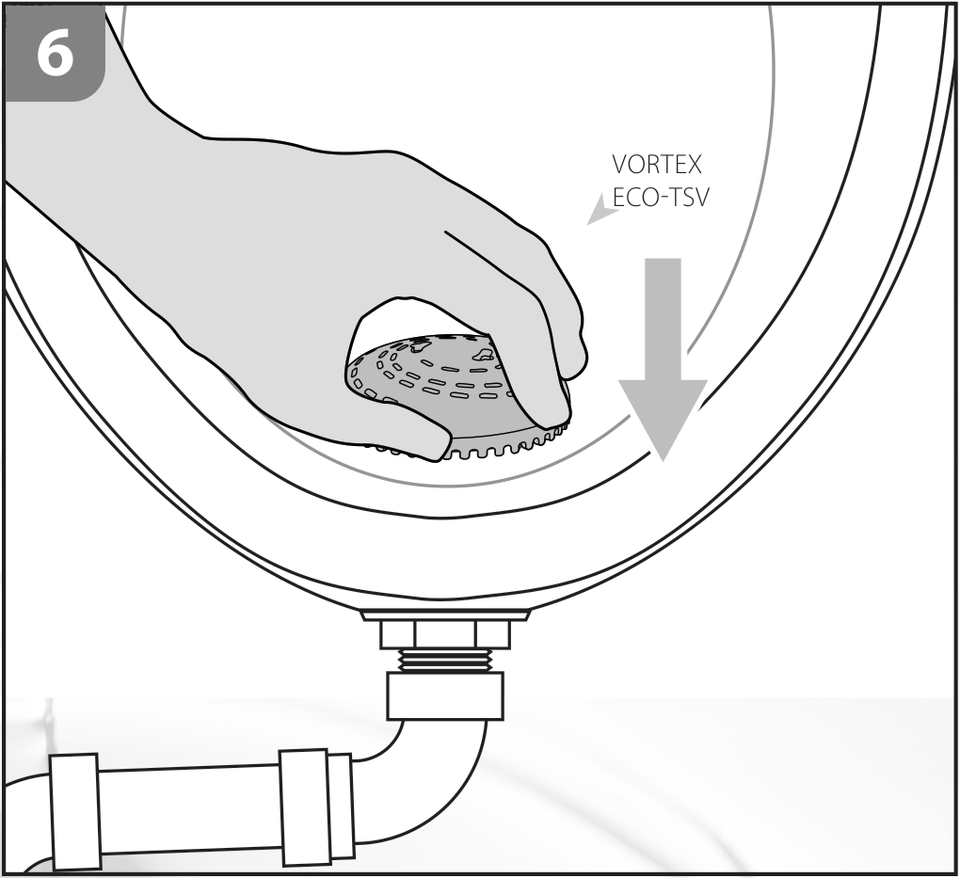 06
Refit the top
Push the top straight down onto the Vortex ECO-TSV™ valve until it locates. Don’t twist it.
 07
Spray with Steri-Kleen
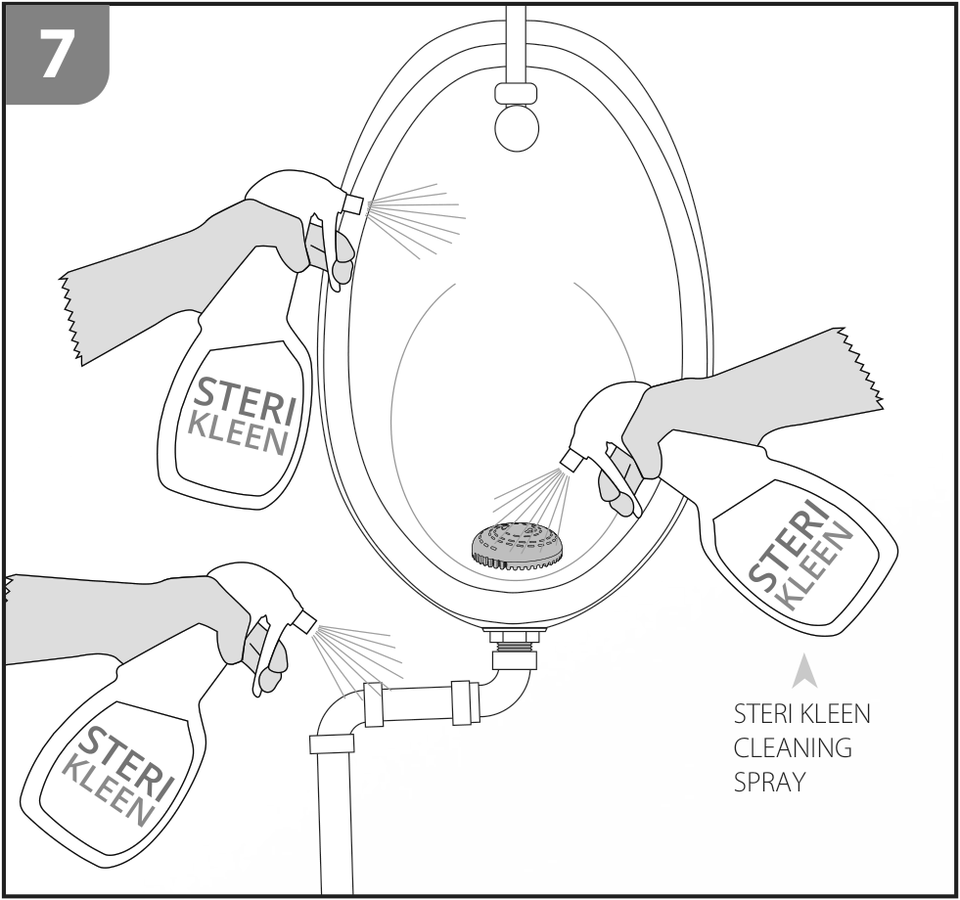
Once the valve is fitted, spray the urinal bowl, the surrounding pipework and all the joints with Steri-Kleen, and don’t wipe it off.
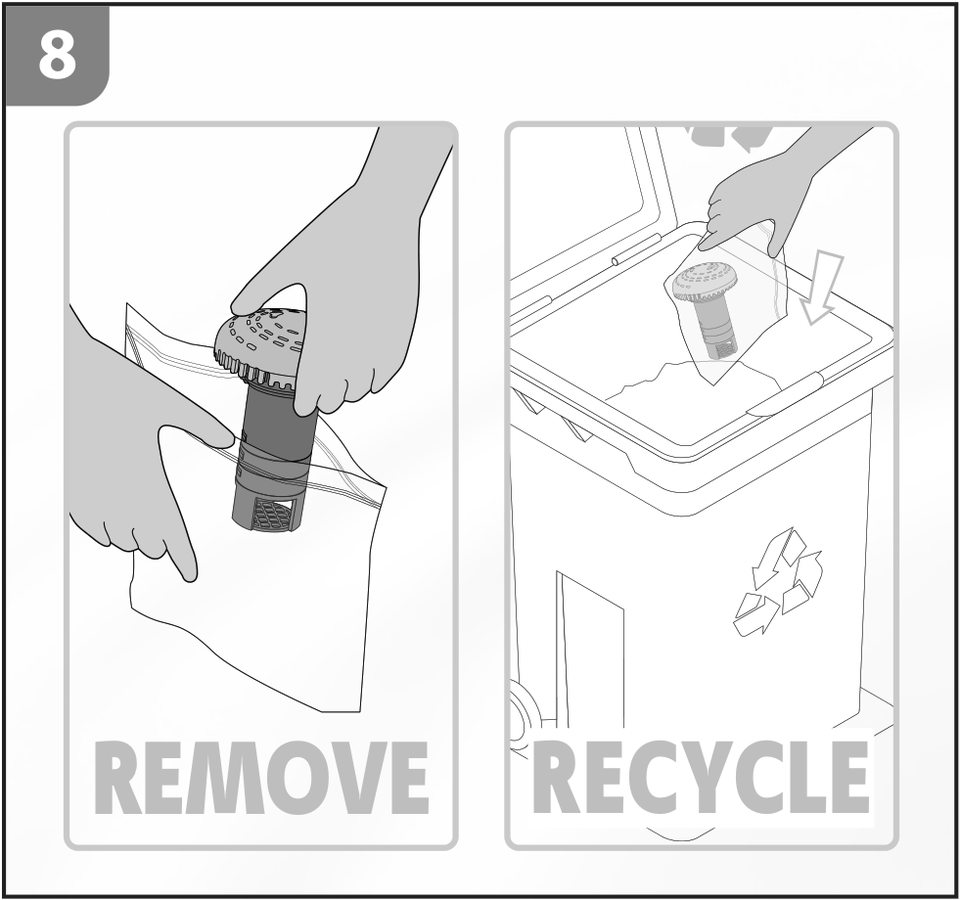 08
When the valve needs changing
Remove the used Vortex ECO-TSV™ valve by hand and recycle it through your local recycling scheme.
PRINTED INSTRUCTIONS
Prefer it on paper?
The same instructions as the leaflet in the kit box, as a PDF to save or print. It also lists what’s in the kit and how to reach us.
Need a hand while you fit?Our technical team is on +44 1392 311 202, Monday to Friday, 9am to 5pm. Or email enquiries@smartilimited.com with a photo of the outlet and we’ll come back to you.
SMARTI ACADEMY
Want to become an accredited Smarti installation specialist?
Train and certify with the Smarti Academy, then earn by installing and servicing Smart Urinal Technology through our partner network.
- 22short modules, with photos and video from real installations
- 80%pass mark, with 100% on the five safety-critical modules
- 12 monthscertificate, refreshed every year to stay current